Trending

Most larders begin with real promise: a cool, deep cupboard, a few sturdy shelves, everything within reach. Six months later, two bags of basmati are wedged behind a jar of honey and you own four half-used packets of cumin. The problem is rarely space. It is that nothing has been given a job. An afternoon spent sorting — zones first, then heights, then a little sensible decanting — turns a larder from somewhere you rummage into somewhere you can actually cook from.
Take everything out, shelf by shelf, and pile it on the kitchen table. Wipe the shelves and sides with a damp cloth and a little washing-up liquid, then dry them properly. Damp shelves are what make cardboard go soft and flour clump.
While the shelves are bare, check the corners for fine webbing or small brown beetles, which turn up in flour and cereal that has sat too long. Anything infested goes straight in the bin outside, and that shelf gets a second clean.
Then work through the pile. Unopened, in-date food you know you will never use can be donated. Anything past its use-by date goes. Best-before dates on dry goods are about quality rather than safety, but if a packet smells stale, has clumped, or has been open for months, bin it. Sort the keep pile into rough groups as you go — tea and coffee, baking, pasta and rice, tins and sauces, snacks — because you will use those groups in a moment.
Categories tell you what things are. Zones tell you where your hand expects to find them. The most useful split is by how often you reach for something, since that decides which shelf it belongs on.
Place each zone at a height that suits it. This is where most larders go wrong.
The best shelf in any larder runs from roughly waist to chest height. It is the one you can reach without looking, stretching or shifting anything out of the way. Daily items belong there, even if they would look tidier somewhere else.
Below waist level, keep weight. Tins, sacks of flour or rice, potatoes and big bottles are easier and safer to lift from a low shelf than from above your head, especially in a narrow larder where you are twisting as you reach.
Above eye level, keep it light: spare kitchen roll, empty jars, napkins, birthday candles, that tin you open twice a year. If reaching it needs a stool, it should not be something you want on a Tuesday night.
Before you set the shelves, measure. Cereal boxes, oil bottles and a two-litre bottle of squash are usually the tallest things you own, and shelf spacing that ignores them wastes several centimetres per shelf for nothing. Ten minutes with a tape measure buys more usable space than any container you can buy afterwards.
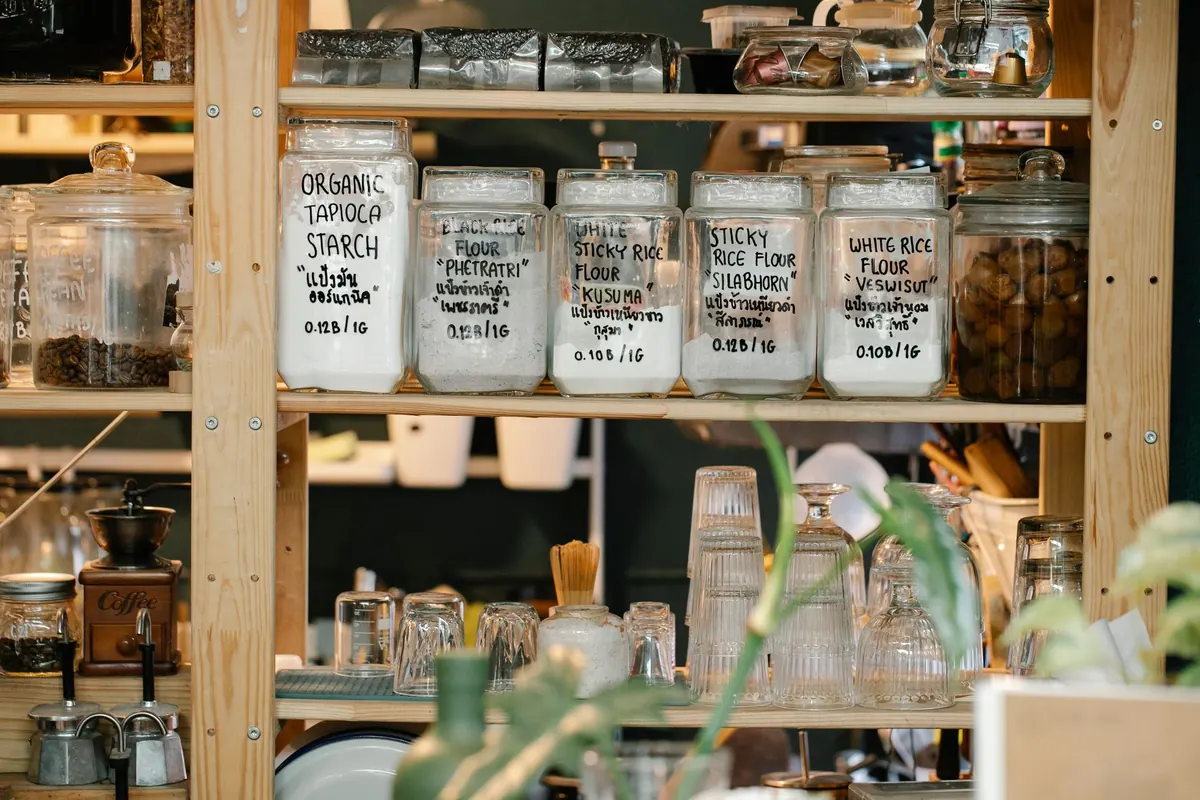
Decanting is a trade, not a rule. You lose the original packaging, including cooking instructions and allergen information. In return you get containers that stack, seal and show you at a glance how much is left. Do it for the things you use weekly and leave the rest in their packets.
Good candidates are flour, sugar, oats, rice, pasta, lentils, couscous, coffee beans and any spice you get through quickly. Packets are flimsy, they slump, they split at the corner and they let in the moths that end up in everything.
Keep the original packet inside the jar whenever it fits. If it does not, cut out the panel with the use-by date and the allergen list, then tape it inside the jar or write the details on the label. This matters most in a household where someone has an allergy: a plain jar tells you nothing, and "probably plain flour" is not good enough.
Choose containers to suit the shelf rather than the look. Square containers waste less space than round ones, clip-top glass does not hold on to smells, and a wide-mouthed jar with a scoop inside beats a tall narrow one for anything you measure out. Measure your shelf depth and height first, then buy.
A jar without a label becomes a mystery within a month. Write the contents and the date on everything you fill: "plain flour, opened 4 March", "porridge oats, decanted 12 Jan". A chalk pen or a fine white marker writes straight on glass and wipes off with a damp cloth, so you can reuse the jar for something else without peeling anything.
Keep to one style across the whole larder — a single pen colour, or a single label size — and the shelves will read as calm rather than busy. If you stack containers, label the side or the front rather than the lid, where you cannot see it.
Two more labels are worth making. A use first basket on the everyday shelf, for open packets and anything close to its date. And a running shopping list on the inside of the door, so you write things down the moment they run out instead of trying to remember them in the supermarket.
Larders fall apart slowly and then all at once. Two habits hold the line.
The first is a two-minute reset each time you cook: put things back in their zone, wipe a spill while it is still a spill, and move anything newly opened to the front. The second is a monthly five-minute check — empty the use-first basket, look at dates, and see what you already have before you shop.
A larder works best as a staging post, not a warehouse. Buying a little less, a little more often keeps stock moving and means you cook with what is genuinely there. Start with the shelf you use most and let the rest follow.
Photo: Sarah Chai / Pexels